· Night EXT
MOONLIGHT
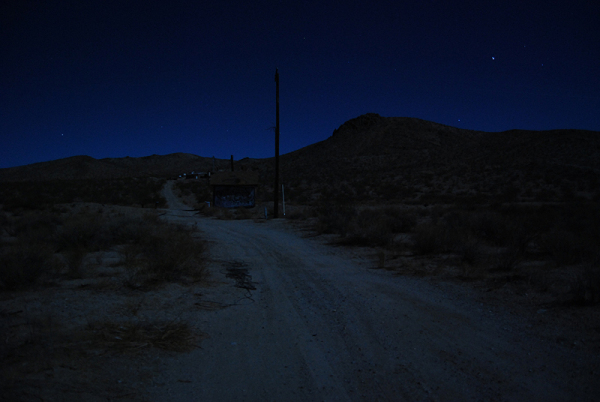
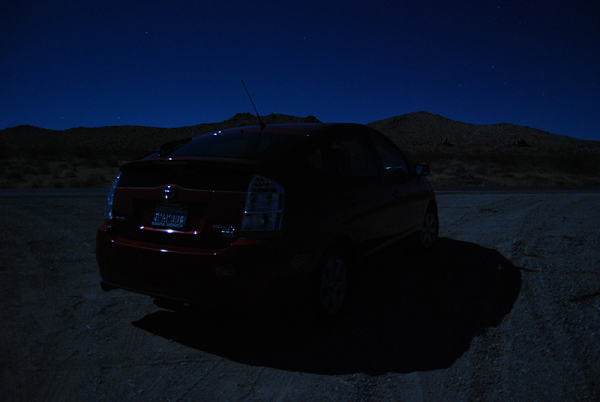
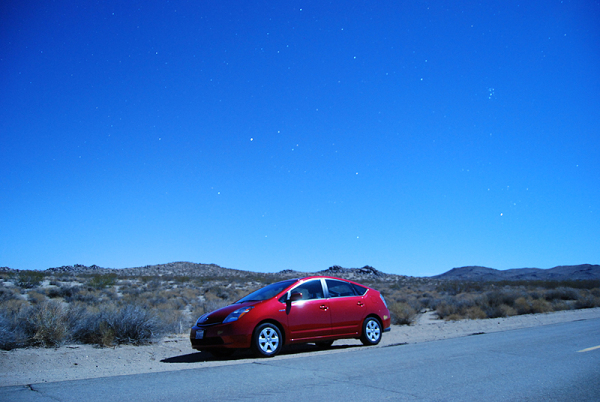
Depends on the look you want, soft moonlight or hard moonlight — in truth, the moon is like the sun, just dimmer, so it’s a hard source, unless there are some light clouds in the way. In general, you want to avoid the sky unless you plan on replacing it in post. On a clear day at a right angle to the sun, a Pola filter will darken the sky a bit and when combined with an ND grad may make the sky dark enough, but then you’d probably still want to add stars in post. You want to use a lot of ND in order to shoot with shallow focus. You want to avoid a scene with light sources in the frame, like flashlights, car headlamps, fires, etc. because none of them will expose brightly enough in daytime. Or plan on adding them in post. So Day-For-Night tend to make more sense in remote rural locations away from any electrical light sources, where the moon would be the brightest source of light in reality. I took these photos of my car by real moonlight that gives you an idea of how similar moonlight is to sunlimght.
Underexposed:
Longer exposure:
SOLSTICE
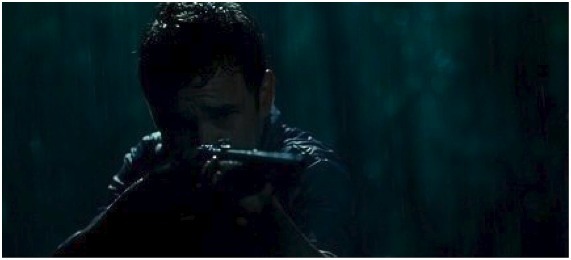
The idea was to create a softer moonlight effect in the swamps, plus it was easier to get a balloon out there. But I decided I wanted the background to be backlit because the balloon was only lighting the foreground area. So in that first one, I had to hide some parallels (scaffolding) in the trees to put an HMI on top, deep in the woods. But most of the action takes place under the lighting balloon after they emerge from the woods. I generally used a big backlight from a half-corrected HMI, but I played with the spot-flood to get more of the backlight on the actors. Also, with all of that foliage blocking part of the far backlight, I probably used an additional small HMI backlight on the second one, to backlight the rain better as well. Smoke and rain help to add detail and texture to the background.
To create a night exterior with depth so that it doesn't look like only the actors are lit, you need a lot of light all around -- it may look a bit overlit to the eye but underexposed and stopped down, it all falls off into the darkness nicely. James Cameron once called it "liquid night" in describing how T2 used a lot of HMI's to cover an area so that there was detail deep into the background.
How much to underexpose the faces just depends on the look and the angle of the light. If the moon is backlighting the scene, then the faces are in the shadow side and can be lit softly but underexposed, maybe two-stops under. But there is a brighter edge to add snap and highlights. But if the moon is sidelighting a scene, it shouldn't be as underexposed or else you won't have enough highlights in the frame, maybe 1.5-stops under or 1-stop under (you can always darken it a bit more in post -- it's better than overdoing the underexposure and having to brighten in post...)
Balloons can be tricky to work with and they aren't always the best solution. On the other hand, in real life, the moon can be dead overhead, it can be totally frontal, etc.
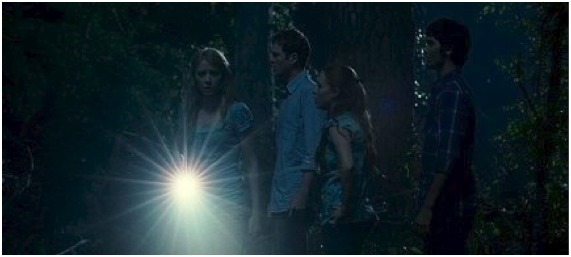
Overhead balloon with both tungsten and HMI globes inside it, hence the half-corrected color:
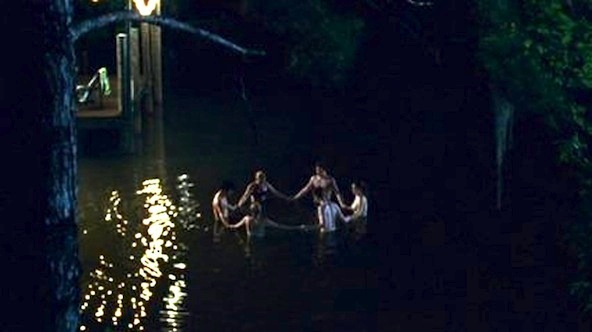
Six people standing in a circle in nearly chest-high water in the lagoon in a swamp, at night. I sweated this over many times in my mind as to how I was going to light for 360 degrees at night. The area had to be netted off from the swamp to keep the alligators away, and then a platform had to be sunk into the mud to give the actors a level platform to stand on. I had the art department use string lights (a string of 40w clear bulbs) on a nearby fishing dock to provide a tungsten-source from one angle, which I augmented with two 2K blonds on a high post, pointing towards camera as if they were worklights of the dock. I had to rate the Eterna 500T at 640 ASA and push it a stop, which is how I shot the carnival scene in "Astronaut Farmer", which had similar strings of bulbs. They seem to look the best at T/2.8 at 640 ASA in that they actually lit something. With the warm backlight from the tungsten on the swamp, with some smoke creaping across the water, it sort of looked like that shot in "Apocalypse Now" when Willard rises out of the water. So from the angle looking at the dock, the actors were tungsten backlit, plus sidelit by an 18K on a condor across the small lake, about two stops underexposed, playing for moonlight. So as I worked my way around the circle in coverage, two people were backlit by tungsten / sidelit by moonlight; two were sidelit by tungsten and backlit by moonlight, and the last two were frontlit by the tungsten mainly, which was a little boring but logical since they were facing the only strong source. Plus by the time I got to that angle, it was nearly sunrise and I did not have time to create a whole new lighting set-up.
On the closer shots where the two actors were tungsten backlit, I flagged off the 18K and used a 4-bank Kino for a softer moonlight -- which sounds simple in theory but a nightmare to rig in four feet of water on the edge of a too-small wooden platform. This was the point where I got soaked. The Kinoflo in the water had a ground fault circuit interrupter. Just to get it to be two-stops underexposed when shooting at T/2.8 at 640 ASA, I ended up with two layers of 216 (plus the 1/2 CTO correction for the daylight tubes) and only one tube was switched on.
As you can imagine, everything went slower once I started putting the camera and a light plus flags into the water. It was a nightmare; I can understand why water movies go over-schedule. For the wide shots, we shot from the shore. I managed to get the production to rent a 60' Technocrane, which we used to good effect to get high and low angles. I couldn't do much side-to-side motion because it was armed out between a gap in the trees, so I had B-camera on dolly tracking sideways during the master as well. For the tighter shots, B-camera had to place their sticks in the water and shoot standing in chest-high water, whereas A-camera could arm out on the crane to get the other angles.
BIG SUR
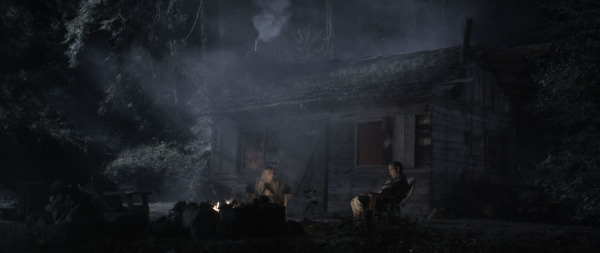
There was a 4K HMI on the hill with two 1.2K HMI's, and on the opposite side, an Image-80 Kino raked the side of the cabin, besides the fire there was a 2'-2-bank Kino on the ground in front of the fireplace with orange gel on it. Inside the cabin were some orange-gelled 1K's on flicker boxes.
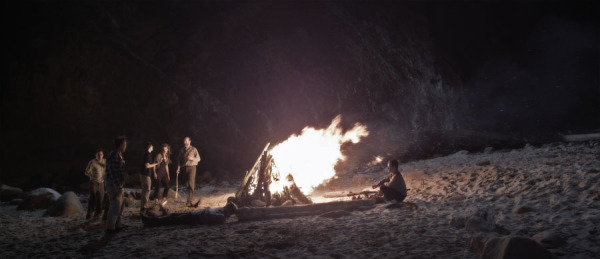
There was an 18K HMI on the top of the cliff in the background with two doubles in it (I could have probably gotten away with a 4K HMI but I didn't know how far it would be). I took a 1.2K HMI way off on the right side of frame and raked the wall of the cliff so it wouldn't go black. The people are lit by the real fire. There is some fill from 4' 4-bank daylight Kinos near camera. I had two orange-gelled 1K Woodylights off camera left, not to light the people, but pointed towards the camera in case one of the actors walked all the way to the foreground, so they would have an orange edge-light on them. But they never did so those orang lights weren't really doing anything in this shot:
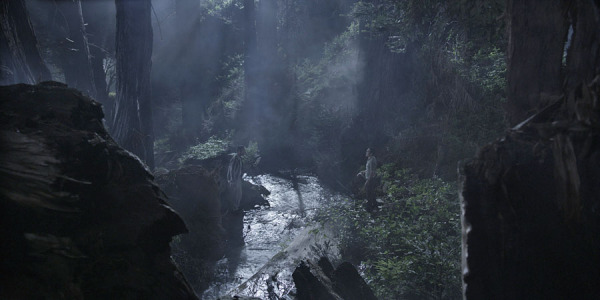
The main problem with lighting the woods is that trees can quickly bloke up your far-off moonlight source. So basically I had to use a couple of units separated by a few feet to get through gaps between trees. At the top of the frame, up a steep hill, we managed to get one 4K HMI and two 1.2K HMI PAR's. I think it's the 4K that managed to get through and light the main area where the two guys are standing, and the two other 1.2K HMI's hit the river further in the background. Up the hill on the left side, off-camera, was an Image-80 Kino, and up the hill on the right side was a 4-bank Kino, all daylight. Then in the foreground, behind camera, was a 4-bank Kino that was flagged a bit off of the foreground tree trunk.
Way, way in the background, down the canyon and then up the access road that came down into the canyon, I built two levels of parallels and put a 12K HMI PAR on it... but after we struggled to get it up there and turned on (it was acting up), it turned out that, despite being up the next hill, it was still downhill of where we were shooting, and it was so far away and so blocked by trees that all it did was put a tiny glow in the top middle-left corner of the frame -- in truth, if it hadn't been for all the trees, the unit would have been in the shot anyway. But with the smoke, it did create a bit of separation in that small area. But it wasn't worth the effort. I had hoped with it being way down the canyon, it would have created more depth but it's really hard at night to judge distance and to see where the trees are that are blocking the light:
STREETLAMP NIGHT EXT
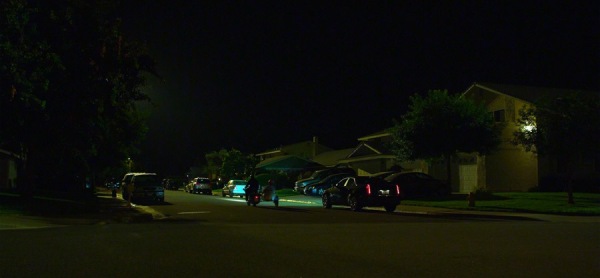
It's a 12-light tungsten with 1/2 Orange to match the sodium streetlamps, though in this particular angle, you can't see the orange street lamps: (DM)
Just to simplify things, I'm going to say that for lighting your 50/50 2-shot that your choices for the main light on them is either a backlight or a top light (or in between, a toppy backlight...) as if from a streetlamp. If you are suggesting a streetlamp, as opposed to moonlight, you at least don't have to light everything from far to near, you can have pools of light, it can fall-off into darkness and then another source can pick up things even farther, etc.
So that light can be soft or hard, though if a far backlight, it's harder to make it soft and it probably should be too soft, but if a toppy backlight or a dead top light, it can be either hard or soft -- I often put lights downwards through an 8'x8' frame of light grid w/ a black skirt for a softened streetlamp effect.... often I used Coops or some other tungsten light I can point straight down, with either orange gel for a sodium look or cyan gel for a metal halide look.
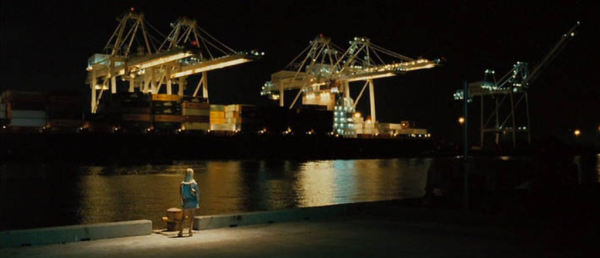
Here's an example from something I shot, "Assassination of a High School President" -- the first one had a 5K tungsten with 1/2 CTO I think as a warm top light, the other used a 1K PARCAN with Cyan 60 gel for a top light over the phone booth.
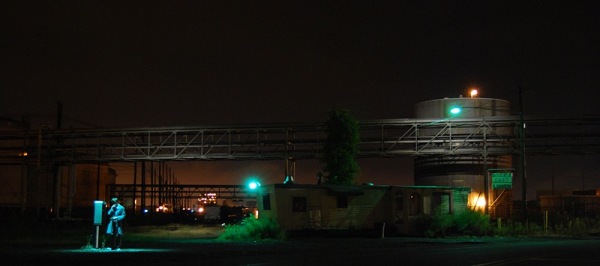
Fuji Eterna 500T pushed one-stop (and rated at 640 ASA), lit with just four 1K PAR's on a 40' Condor (plus I added a mercury-vapor practical to the abandoned diner we found), (with spot globes, or VNSP) in it. The main one -- pointed down at the phone booth -- was gelled with Rosco CalColor Cyan 60 to create a pseudo-mercury-vapor color, though the spotlight is spottier than a real streetlamp would be. The remaining PARCAN's were just there in the condor bucket to be tried-out for sketching out the background detail. They were ungelled, so 3200K (white). One was pointed at the tressle across the top and another at the water tank on the right. The others were aimed deeper. Now technically, they should have been gelled to either match the blue-green mercury-vapor lights (like the one in front of the water tank) or orange to suggest a sodium-vapor streetlamp (like the horizon is lit by, and the base of the water tank.) But since those lights were not planned, just switched-on and panned around until I liked what they were doing, I didn't have gel on them and I didn't have time to gel them. I also, probably, was thinking that it would be good to have some neutral 3200K light in the scene.and those had scrims in them to get the level down to a T/1.3 so that I could capture the ambient streetlighting and glow in the horizon. I added the extra mercury-vapor practical to the left end of the trailer. You can see that the real mercury-vapor color is somewhat greener than the Cyan gel I was using overhead, but I actually prefer the color of the gel. This is a digital snapshot taken with my Nikon of the set-up. The glow in the horizon is from the city. I think in the close-ups at the phone booth, I floated a 4’x4’ diffusion frame (probably an Opal or 250) over his head to soften the top light (not 100% sure, we were working so fast out there). It would have been hard to switch to a Chinese Lantern because of the Cyan 60 gel on the light — if it had been a white light, I probably would have done that.
The thing with colored lighting is you have to decide which is better for the mood of the scene and whether you want it to be similar to the far background lights or the opposite, and which color you want to see on the faces for the close-ups.
Now you can use HMI's for a toppy backlight since the heads won't be pointed straight down, but angled out slightly. And they are closer to the metal halide color, you just need some gel combination to get there -- probably 1/4 CTO + 1/2 Plus Green is a fairly close match to that color, which is similar to Cool White fluorescents, but you can vary that for effect if it doesn't have to be a dead match to some lamp in the shot, you can have more green or no green at all, etc.
The thing is that to get the top light or backlight unit into place, you're going to need a condor of some kind, though for overhead, a 45' condor may be enough. If that's out of your budget, then you could work much closer to the actors and build a menace arm with a 1.2K HMI on the end of it, armed out, or two of them armed from each side of the frame for a crosslight effect. Or maybe there's a convenient thing to mount a lamp to, like the arm of a streetlamp above frame, but then, you'd need a lift just to rig the light anyway, though a scissor lift may do. But then, if you can work closer to the actor, sometimes a Chinese Lantern or a Kino on a menace arm will also work. Trouble with smaller lights closer is just that it "feels" like a practical source near the actors rather than one from much farther and higher.
Now for the close-ups, it's not unusual to work closer and softer with the lights.
OUTDOOR MALL NIGHT EXTERIOR SCENES
one by a parking spot and another was a big Steadicam walk-n-talk through the mall, lit with some 12-lights, one as a backlight on top of a building, the others coming from the sides through frames of Light Grid Cloth. (DM)
JENNIFER'S BODY
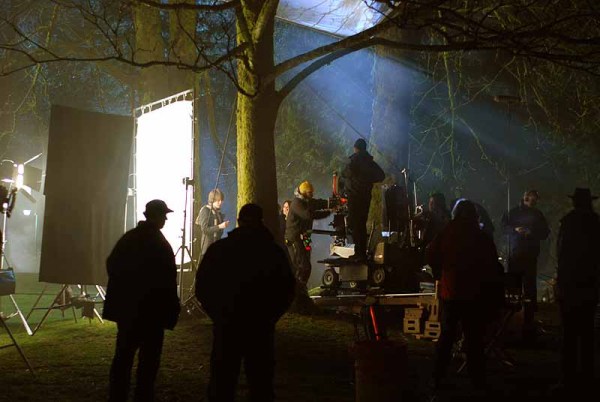
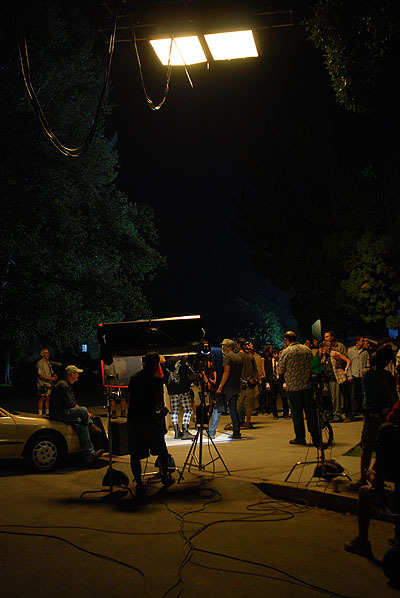
Dialogue scene under a tree in the park, lit mostly from one side with a soft light, and a backlight from a condor (an 18K HMI with Full CTO on it.) The scene itself was exposed much darker than what you see. The frame of Half Soft Frost in the tree tops is not for lighting, but to keep the rain drops off of the actors.
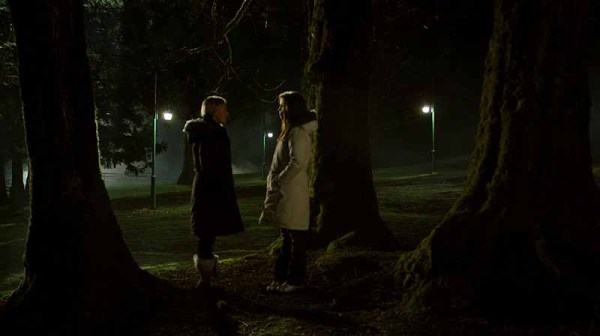
This shot of the stand-ins is closer to the look (sorry but the focus is off in my snapshot). This photo is of the master, whereas the crew photo above was done while shooting one of the close-ups, where I switched to a much larger soft light.
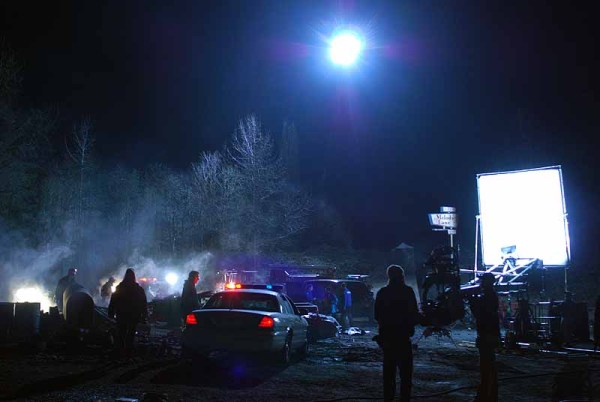
Here is a shot of us shooting the fire explosion aftermath scene. The art department got me three halogen work lights to dress in the rubble as if the investigators had set them up; I also backlit everything with an 18K HMI (no green this time) on a condor and added a soft fill from one side with a 4K HMI bounced into a 12'x12'. Again, this photo was exposed brighter than how I exposed the scene.
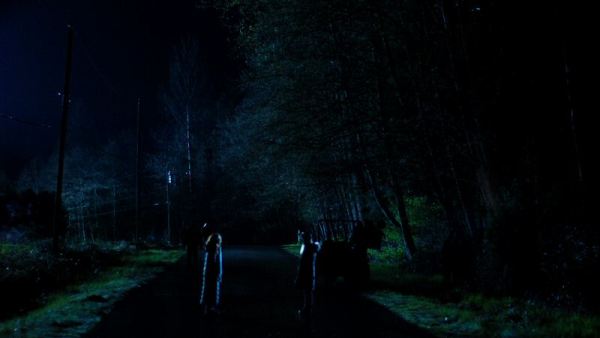
Scene of two people who meet each other in the middle of the night on a moonlit road. I had two 18K HMI's on a condor way up the road (maybe nearly two city blocks away) and even at full spot, I only got an f/1.4 at 640 ASA (5219 with a one-stop push). I had to add a 4K HMI on a high stand to light the midground up the road, and then hide a 6K HMI way up the road to rake another dark patch of woods at the top of the road.
As always, I've had trouble getting the lights in the air out of the frame even with 125' condors, because of their distance. I had to shoot the wide shot on a 40mm lens so that I could compress the space a little and not see so much into the sky where the lights were. This is a shot of stand-ins while I was working, shot at a f/2-2.8 split. I had to hide a 400w Joker on the right side of the road, hidden with some portable pine trees we stuck in there, to edge light the person standing with their back to the condor light, to separate them from the black road.
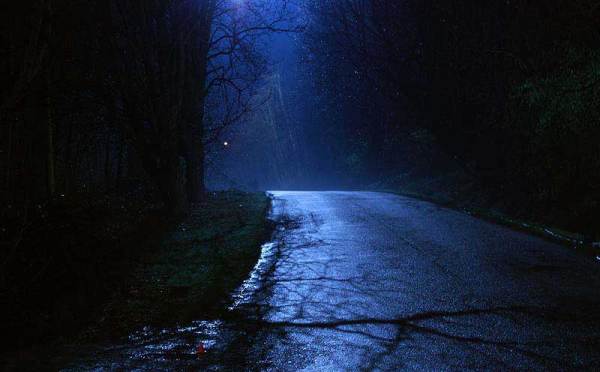
This was a case where the incident meter told me that I had a T/1.4 at 400 ASA, but because of the glare off of the wet road (it had just rained, the mist in the air was natural too), my DLSR said it looked better at a T/2.8. It was backlit with an 18K HMI on a 100' condor at the far end of the road; another HMI on the same condor pointed at the opposite direction to front-lit the far end of the trees.
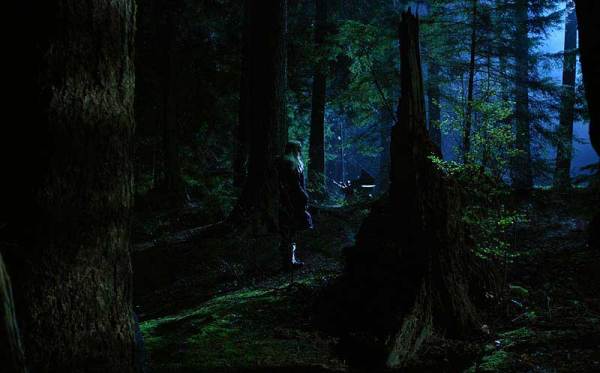
This was a shot from Friday night of some woods, backlight from a far away condor, again with an 18K HMI on it. I also had an HMI lighting balloon overhead, dimmed down. At the last minute, I added a rake across the foreground tree trunks with a small HMI Joker. (In this case, we added the slight mist in the air). I shot at a T/2-2.8 split at 640 ASA (one-stop push).
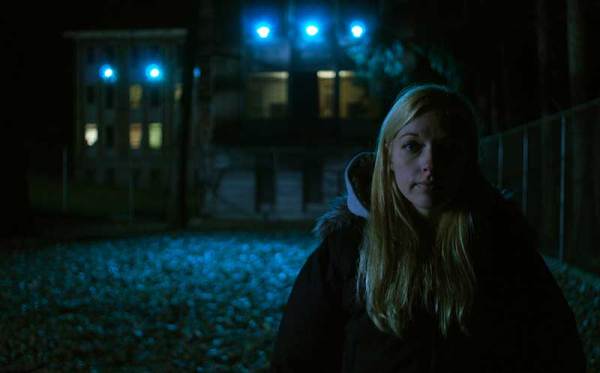
This was the night shot of the building where I added the HMI Jokers with Plus Green on them for a metal halide security light look (T/2.8 at 320 ASA):
BIG LOVE
This is a night exterior, lit with an overhead effect using Cooplights in a condor. I also had a 1K parcan in the condor providing the spot on the ground under the streetlamp on the left. I hid 2K’s in the trees to add some light deeper on the street and there was a 5K around the corner in the background to rake the far houses:

WOLFMAN
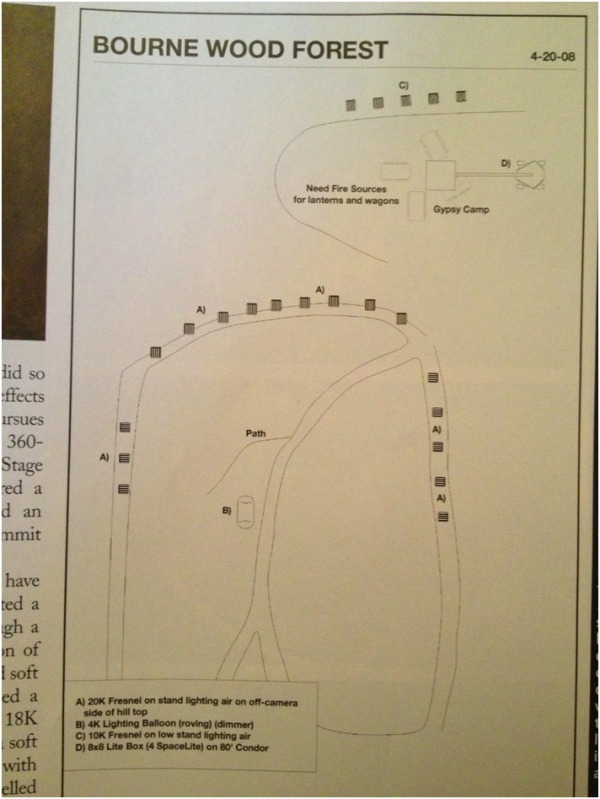
Moonlight: 3 different approaches thruout he film: as a soft source overhead-- a 20'x20' soft box loaded with 30 space lights; as a silhouette source seen through the distant trees-- created with rows of 20Ks backlighting ground fpg; and, finally; as a lit silhouette achieved by ppsjtioning an array of Dinos low and back- lighting a night scape created by towering clouds of smoke.

I believed I could underlight the forest with 20Ks placed [in a spot where the forest floor descended]," he explains. "The sequence could be built upon images of foreground forms moving before tangled, dramatic backgrounds. This lighting scheme allowed us to look up without limits and create a sense of scale for our characters within their surroundings." Bottom: Large, crane-mounted softboxes provide an eerie atmosphere.
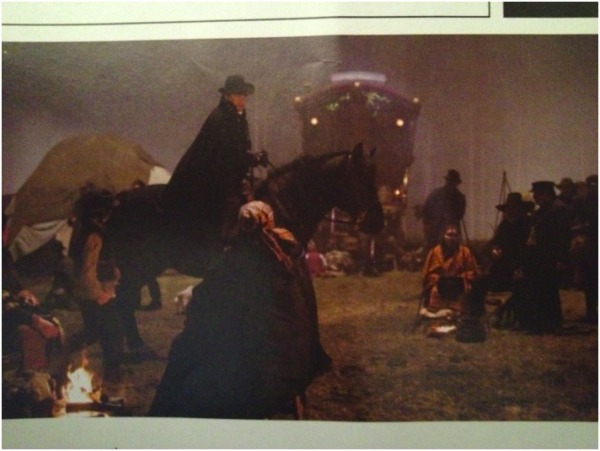
Onstage, I created a moonlight source to project through a 16'-wide cutout in the top portion of the backing that was both hard and soft from the same direction. I formed a hard shadow using an open-face 18K gelled with 3/4 CTO and created a sof source from the same placement with an array of diffused Maxi-Brutes gelled with 1/4 CTB. The soft light ave us he wrap we needed for the fog to carry the light into some shadows, and the 18K gave us the glint we needed to bring the moonlight to the fever pitch required for the content of the scene. (ACM Feb 2010)
THE RUINS 2008
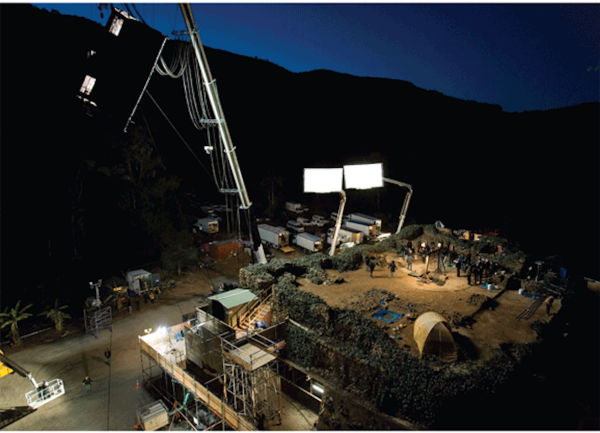
Khondji wanted a balance between stylization and realism "so you' re not quite sure if it's moonlight or something less tangible. To create an uncomfortable, dirty feeling we made sure the color of the night wasn't too blue and had a touch of green."
To create soft moonlight sources, Garside constructed a 240K softbox keylight using 20 12K space lights mounted vertically on a frame. In front of that was '/2 CTB with '/4 Plus Green, and the structure was then swathed in 1/2 gridcloth. The source was positioned about 80' in the air, providing an exposure of T1.4 1/2. We put Dinos on a platform running along the outside of the set. The lights sat below the level of the top of the set so Darius could shoot over them, and we then raised two 20-by-12-foot bounce sheets on 135-foot-high cranes to create a soft ambience over the set." (ACM April 2008)
THE COMPANY TNT 2007
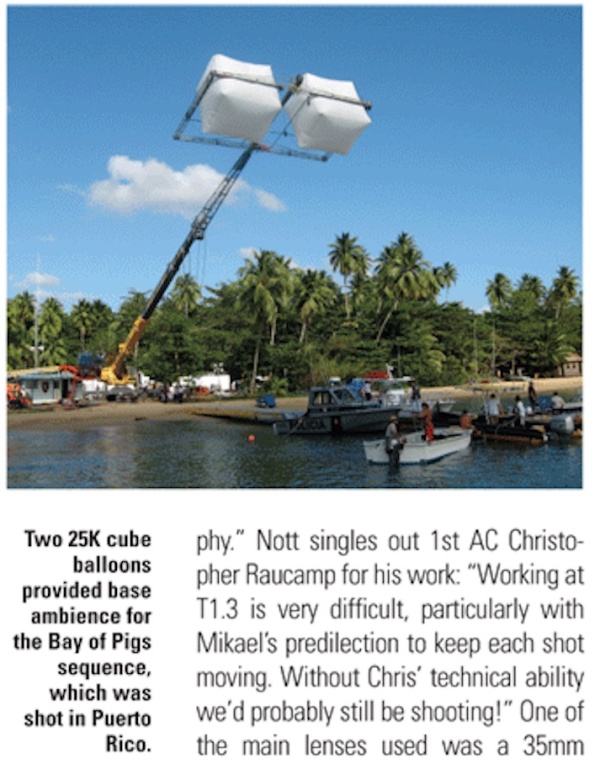
created the Bay of Pigs invasion, an abortive attempt by the Kennedy administration to overthrow Fidel Castro. "That was a pretty big setup," recalls Nott. "Gaffer mounted two 25K cube balloons [set at 4500'K] in a truss framework on the end of a 200-foot construction crane to create the base ambience. Four Condors along the beach, each containing an 18K and a Dino [corrected to 4200'K], gave us a back edge and could be used to light the background when required. The cube ballooiis are great units; their shape makes rigging easier, and coupled with tlute massive reach of the crane they saved us a great deal of time by providing a broad, soft, top source we could move quickly over any part of the set. (ACM Aug 2007)
Sources: